We’re constantly working to improve the functionality and user interface of our online document management apps. Today we introduce our online signature app’s new user interface. The changes we are about to discuss are coming within the next weeks.
An Overview of the New Online Signature App Interface
The new GroupDocs Signature dashboard will look a lot like the main GroupDocs dashboard so it will feel familiar to GroupDocs users. [caption id=“attachment_216” align=“aligncenter” width=“650” caption=“GroupDocs’ online signature app - the new dashboard”]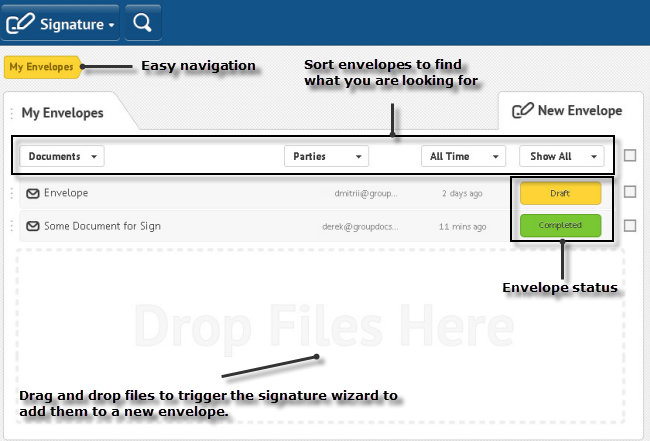 [/caption] We developed a completely new workflow which leads you through the signing process step by step:
- Add one or more documents you want to be signed.
- Add signers and CCs. Fill in their details.
- Prepare an email for the recipients: add a subject and a message.
- Set up all necessary reminders.
- Add custom fields to the document to collect all needed information such as address, date, initials, etc.
- Save and send the envelope.
[caption id=“attachment_220” align=“aligncenter” width=“650” caption=“GroupDocs Signature - The online signing workflow”]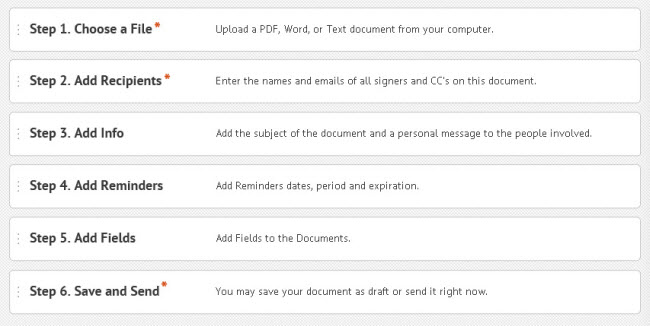 [/caption] Let’s now look at the online signing workflow more closely.
1. ** Upload a document you want to get signed.**
You can either specify a path to the file or use the new Drag and Drop feature to add it to an envelope. [caption id=“attachment_218” align=“aligncenter” width=“650” caption=“GroupDocs Signature - Drag and drop interface”]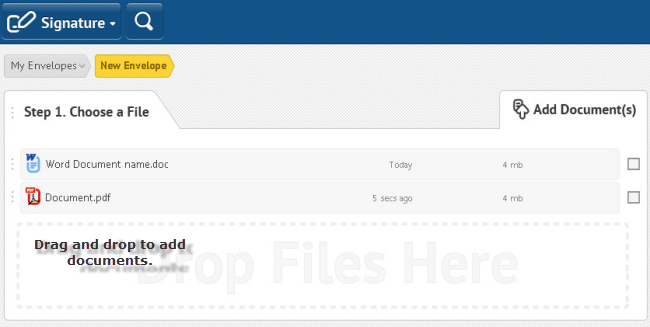 [/caption]
2. Add recipients
You can add recipients as signers (those who are requested to sign the document) and/or as CCs (those who will receive a copy of the signed document). You can also add yourself as a recipient by clicking on the Add me button. [caption id=“attachment_214” align=“aligncenter” width=“650” caption=“GroupDocs Signature - Specify recipients”]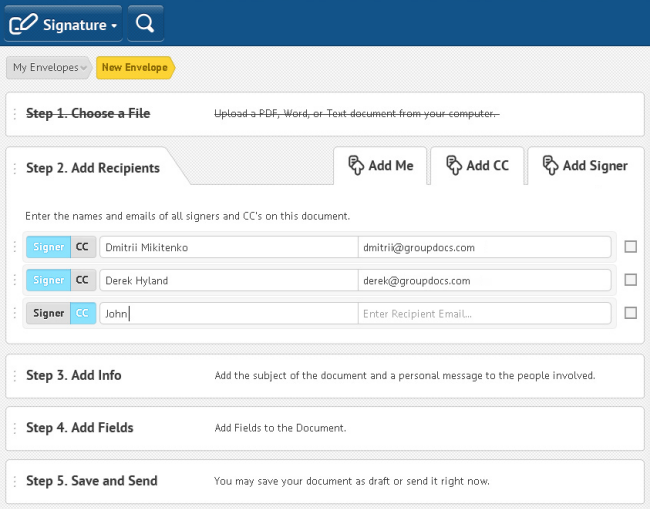 [/caption]
3. Add email information
Type an email subject and message. Be sure to include any information recipients need to know before signing a document. [caption id=“attachment_221” align=“aligncenter” width=“650” caption=“GroupDocs Signature - Prepare an email”]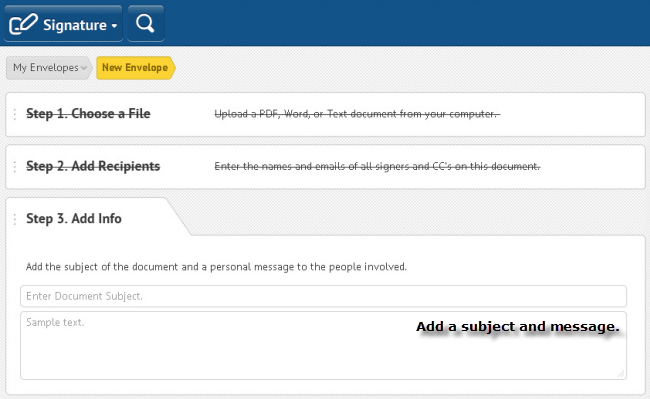 [/caption]
4. Add reminders
Set up automatic reminders and don’t worry about deadlines. Our online signature app sends email notifications, so that recipients won’t miss to sign the document. [caption id=“attachment_215” align=“aligncenter” width=“650” caption=“GroupDocs Signature - Reminders and envelope expiration”] [/caption]
5. Add fields to the document
Add custom fields to the document to collect necessary data from the signers, such as name, address, title, date, etc. [caption id=“attachment_213” align=“aligncenter” width=“650” caption=“GroupDocs Signature - Add custom fields”]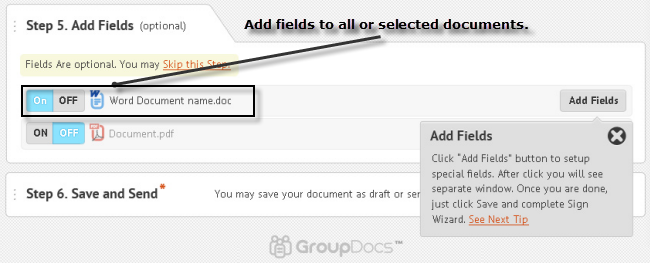 [/caption] [caption id=“attachment_219” align=“aligncenter” width=“650” caption=“GroupDocs Signature - New tools”]
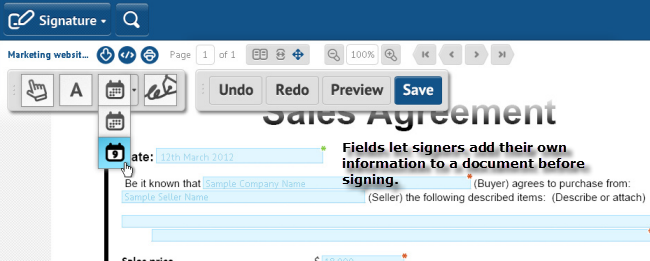 [/caption]
6. Save and send
Send the envelope right away or save it as a draft, so that you can come back and review it anytime later. [caption id=“attachment_217” align=“aligncenter” width=“650” caption=“GroupDocs Signature - Check and save envelope settings”]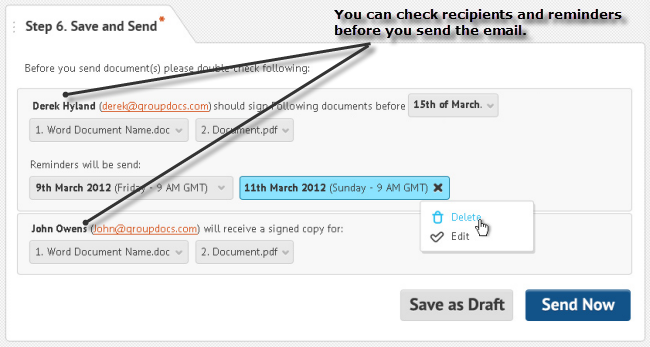 [/caption]