In one of our previous articles we discussed how a typical online signature service works and took a brief look at GroupDocs’ online signature app. Today we’ll see how this application helps you to sign a document online step by step. This article doesn’t cover all the features of the app, just the basics you need to know to sign a document online. Please Note: to start using GroupDocs’ online signature service, you need to register with us first. But don’t worry: we provide a free 14 days trial so that you can test the apps’ features before buying it.
How to Sign a Document with GroupDocs’ Online Signature ServiceYou can sign documents already stored on your GroupDocs profile, or you can upload a new document. Here, we’ll show you how to start by uploading a document.
- Select Signature from the Apps menu. The GroupDocs Signature Home page appears.
- Create an envelope by adding a document:
- Click Upload Document & Start.
- Browse to and select one or more documents.
- CTRL + click to select more than one file.
- Click Open. The documents you selected are loaded into a new envelope.
- Add recipients:
- Click Add Me to add yourself as a signer.
- Click Add Email.
- In the Please add recipient dialog, enter the recipient’s first and last names, and their email address.
- Make sure that the role is Signer.
- Click Add.
- Close the dialog.
- Click Add Email Settings.
- Enter a subject and a message.
- Close the dialog.
- Click Send. The emails are sent and you’re returned to the Signature dashboard. If your recipients don’t have an account, they are asked to create one before logging in to sign the document.
- You are informed by email once the document is signed.
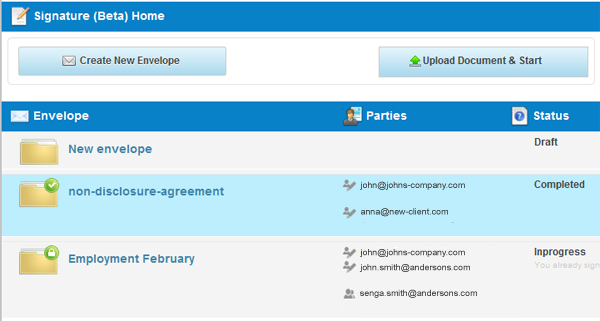
[caption id=“attachment_66” align=“aligncenter” width=“600” caption=“GroupDocs Online Signature dashboard shows the status of your signature envelopes.”] [/caption] This is how the signing process basically looks like. Find more about GroupDocs’s online signature app’s features. We appreciate you comments and suggestions so please feel free to contact us.