This article explains the basics of using AppHarbor. In this article, I’ll use the .NET SDK Samples project to show how to deploy a .NET project on AppHarbor.
Requirements
- .NET project
- App account
- GitHub
Preparing
First of all, we need a AppHarbor account. If you don’t have one yet, please create one. Registration on AppHarbor is similar to any other site: sign up from the AppHarbor home page by clicking the Sign up button. Ok now we have AppHarbor account and we are ready to deploy.
- Clone the GroupDocs GitHub repository containing the .NET SDK.
- Create an empty folder anywhere on your local machine. Name it groupdocs-dotnet-samples.
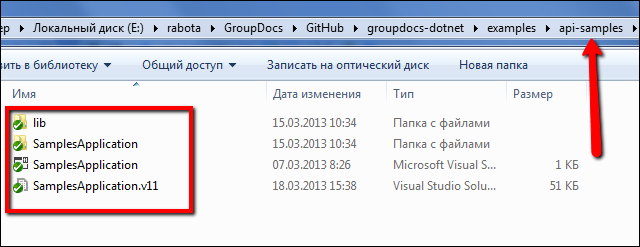
- Go to the folder with the cloned repository and then to the examples folder. Here you can see some folders, one of them will be api-samples.
- Copy the content of the api-samplesfolder. [caption id=“attachment_1746” align=“aligncenter” width=“640” caption=“Copying content from the api-samples folder”]
 [/caption]
 - Post the copied content to the empty folder created in step 2.
Preparation is complete. If you can’t wait and want to see the example working, you can go straight to GroupDocs .NET API Samples and see our samples at work.
Deploy to AppHarbor
-
Login to AppHarbor. and go to Your Applications. [caption id=“attachment_1750” align=“aligncenter” width=“640” caption=“The Your Applications link”]
 [/caption]
 -
Create a new application:
- Enter an application name.
- Choose United States or Europe.
- Click Create new. [caption id=“attachment_1753” align=“aligncenter” width=“640” caption=“Creating a new application”]
 [/caption]
-
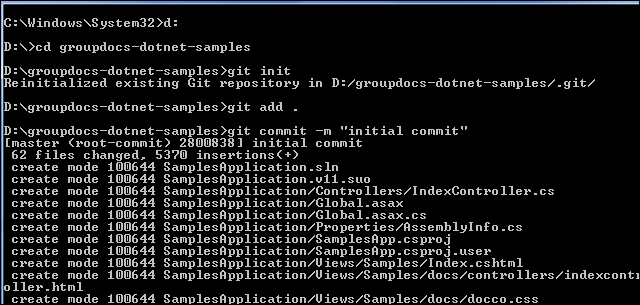
Open a console and cd to the folder that the project was copied to. It’s a groupdocs-dotnet-samples folder.
-
Enter the command git init
-
Then enter the command git add . (This adds all files.)
-
Enter the command git commit -m “Initial commit” [caption id=“attachment_1757” align=“aligncenter” width=“640” caption=“The result of steps 3, 4, 5 and 6 in the console”]
 [/caption]
 -
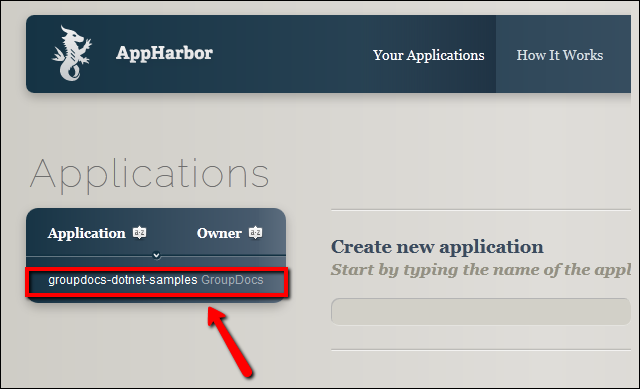
Go to Your Applicationsin AppHarbor and click on you application. [caption id=“attachment_1766” align=“aligncenter” width=“640” caption=“Application panel”]
 [/caption]
 -
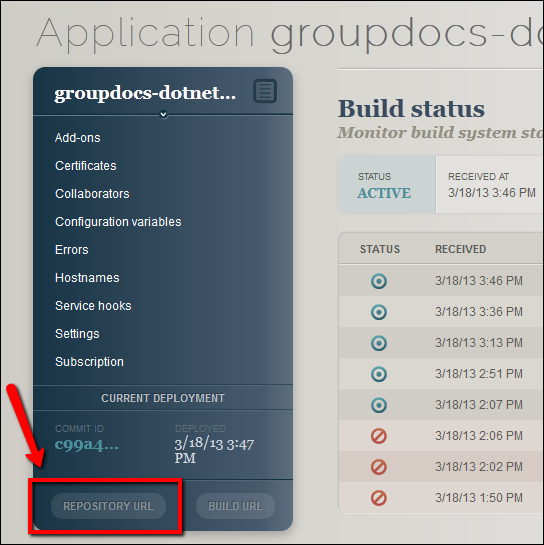
Copy the URL of your application. [caption id=“attachment_1770” align=“aligncenter” width=“544” caption=“Button for copying URL”]
 [/caption]
 -
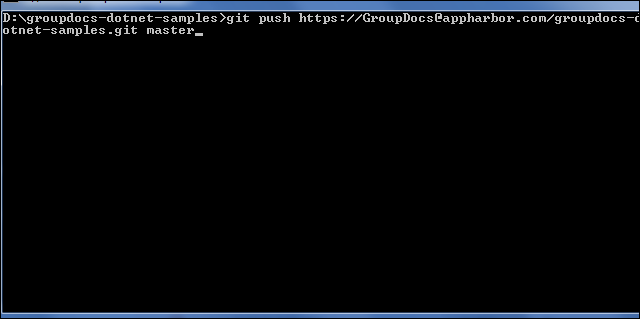
Return to the console and, as a final step, enter the command git push [URL of the api you copied] master**.** [caption id=“attachment_1773” align=“aligncenter” width=“640” caption=“Deploying to AppHarbor”]
 [/caption]
Running a Project on AppHarbour
After these steps, our local project is deployed on AppHarbor. Lets go to AppHarbor and run the project. In Applications, we see the build status of the current commit. If it is Active, there is a link to run it. [caption id=“attachment_1778” align=“aligncenter” width=“640” caption=“Status of the current build and link to run API”]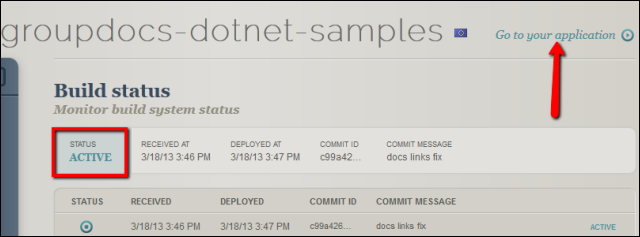 [/caption] That’s all, as easy as a piece of cake.